Tuesday, May 26, 2015

Control an LED to be blinking ON and OFF using Python

1. Connect an LED and a resistor to the Raspberry Pi as instructions.

2. Connect the power to GPIO4 pin of Raspberry Pi instead of 3.3V. (Connect the longer leg / pin of the LED (called the anode) to the GPIO4 pin.)

3. Type the commands below:

nano blink.py

This edits the blink.py file in the nano editor. Type the code below:

import RPi.GPIO as GPIO
import time

GPIO.setmode(GPIO.BCM)
GPIO.setup(4,GPIO.OUT)

while True:
    GPIO.output(4,1)
    time.sleep(1)
    GPIO.output(4,0)
    time.sleep(1)


Execute the Python file:

sudo python blink.py

And the LED is blinking!!


Saturday, May 23, 2015

Control an LED remotely using VNC (Virtual Network Computing)

1. Make sure an LED can be switched ON/OFF locally with a Raspberry Pi. See instructions here.

2. Connect Raspberry Pi to the internet and install the VNC server with the following command:

sudo apt-get install tightvncserver


3. Start the VNC server:

vncserver


One line of the results could be like this:

New 'X' desktop is raspberrypi:2

where 2 is the port number.


4. Add VNC viewer to Google Chrome with a PC/Mac.

Connect to Raspberry Pi's IP address, a colon character(:), and the port number. The IP address can be obtained by typing the ifconfig command or the hostname -I command in Raspberry Pi's terminal.)


Click 'Connect'


Enter the password. (Note: If you want to change the VNC password, simply type vncpasswd command in Raspberry Pi's terminal.)

Congratulations when you can see the desktop of Raspberry Pi!!

5. Open the terminal and type in the following commands:

sudo python

>>> import RPi.GPIO as GPIO
>>> GPIO.setmode(GPIO.BCM)
>>> GPIO.setup(4,GPIO.OUT)
>>> GPIO.output(4,1)

(Note: VNC is a convenient way to take screenshot / print screen of Raspberry Pi.)

Now the LED connected to GPIO4 should be turned ON!!

Wednesday, May 20, 2015

Control an LED remotely using SSH(Secure Shell)

1. Make sure an LED can be switched ON/OFF locally with a Raspberry Pi. See instructions here.

2. Enable the SSH server using raspi-config:

Type in the terminal:

sudo raspi-config

Select 'Advanced Options'.


Select 'A4 SSH'.


Select 'Enable'.


3. Get the IP address with the ifconfig command.

You will get the IP address such as 192.168.10.183.

4. Download and run PuTTY with a Windows PC.

5. Key in the IP address as the host name and keep the port as 22:
6. Click YES.

7. Login to Raspberry Pi.
7. Enter the commands below to control the LED to be ON/OFF:

sudo python

>>> import RPi.GPIO as GPIO
>>> GPIO.setmode(GPIO.BCM)
>>> GPIO.setup(4,GPIO.OUT)
>>> GPIO.output(4,1)

LED is turned on!


>>> GPIO.output(4,0)

And the LED is turned OFF with a remote PC!

Tuesday, May 19, 2015

Control an LED to be ON/OFF

1. Connect an LED and a resistor to the Raspberry Pi as instructions.

2. Connect the power to GPIO 4 pin of Raspberry Pi instead of 3.3V.

3. Type the commands below:

sudo python

>>> import RPi.GPIO as GPIO
>>> GPIO.setmode(GPIO.BCM)
>>> GPIO.setup(4,GPIO.OUT)
>>> GPIO.output(4,1)

 LED is ON.
 >>> GPIO.output(4,0)
LED is OFF.

Sunday, May 17, 2015

Light up an LED (light-emitting diode)

1. Refer to the GPIO (General-purpose input/output) location of Raspberry Pi 2 Model B:
Below image is from: https://www.raspberrypi.org/documentation/usage/gpio-plus-and-raspi2/README.md


2. Refer to the breadboard internal connection.
Below image is from: http://whitelinetracer.page.tl/Details-of-Components--d--Page1.htm

3. Connect the 3.3V and ground pins to a breadboard.

4. Connect the longer leg / pin of the LED (called the anode) to the 3.3V voltage supply.

5. Connect one pin of a resistor to the shorter leg / pin of the LED (called the cathode), and the other pin of the resistor to the ground.

6. The LED should light up as the photo below:


Thursday, April 16, 2015

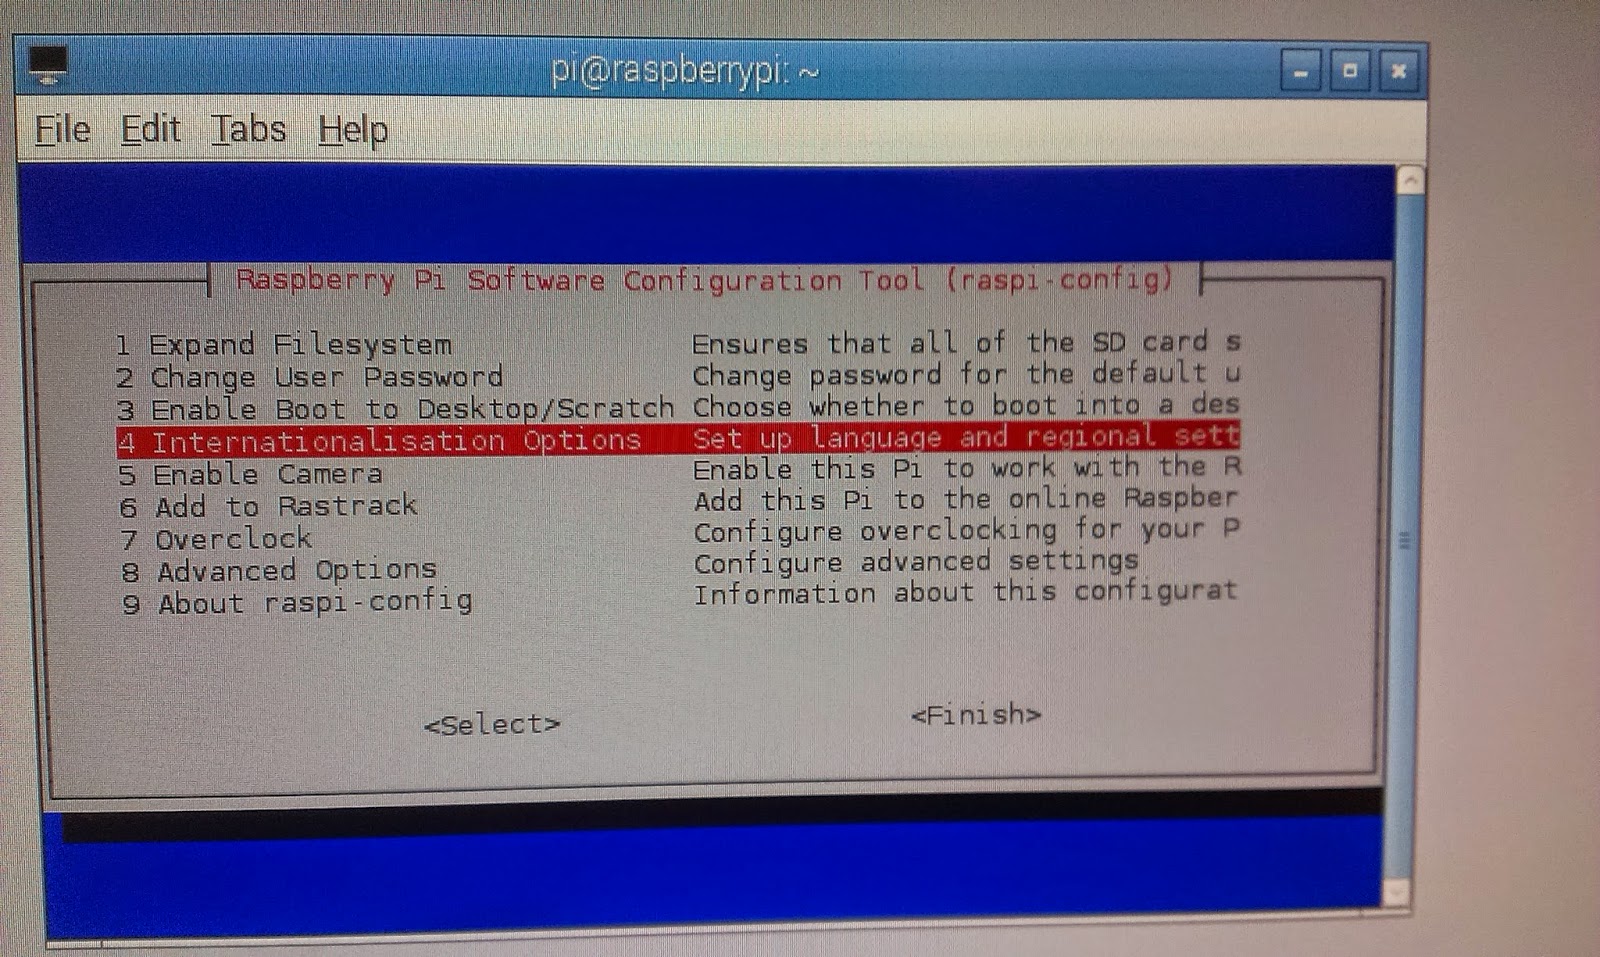
Resolve the wrong character problem by the keyboard configuration - using raspi-config

While programming, some characters are wrong such as " and @ signs.

To resolve this issue, the keyboard configuration must be changed from the default UK type to the US type.

1. Type this command:

sudo raspi-config


2. In raspi-config, select:

4 Internationalisation Options


3. Select:

I3 Change Keyboard Layout


4. Select:

Generic 105-key (Intl) PC

5. Change the keyboard layout to US:

English (US)


6.  Select:

No AltGr key


7. Select:

No compose key

8. It is up to you to select Yes or No.

Quit raspi-config.
The Raspberry Pi may need to restart for new keyboard settings to be applied.

Wednesday, April 15, 2015

WordPress installation

To setup a blog server on Raspberry Pi, WordPress is a good solution.

1. Install Apache, MySQL and PHP.

2. Install WordPress:

sudo apt-get install wordpress


3. Link the newly create folder "blog" on Apache server to the location of WordPress:

sudo ln -s /usr/share/wordpress /var/www/blog

go to /var/www/blog/ and check with the ls command.


Go back to /var/www/ and type ls -l.

It is shown that blog -> /usr/share/wordpress.


4. Go to MySQL monitor:

mysql -u root -p

Create a database called "wordpress" within MySQL monitor:

create database wordpress;

Check if the database is created successfully:

show databases;
Type quit to exit the MySQL monitor.

5. Copy and edit the php file below using these commands:

sudo cp /var/www/blog/wp-config-sample.php /etc/wordpress/config-default.php

sudo nano /etc/wordpress/config-default.php

6. Edit the database, username, and password as:

wordpress, root, and your_password


Use a browser of another PC to access:

192.168.xxx.xxx/blog/

the browser is redirected to

192.168.xxx.xxx/blog/wp-admin/install.php


Follow the instructions to install WordPress.

Done~

Login to WordPress and add the first post.


Go back to the blog address:

192.168.xxx.xxx/blog/

Now the first post is successfully displayed!!