Thursday, April 16, 2015

Resolve the wrong character problem by the keyboard configuration - using raspi-config

While programming, some characters are wrong such as " and @ signs.

To resolve this issue, the keyboard configuration must be changed from the default UK type to the US type.

1. Type this command:

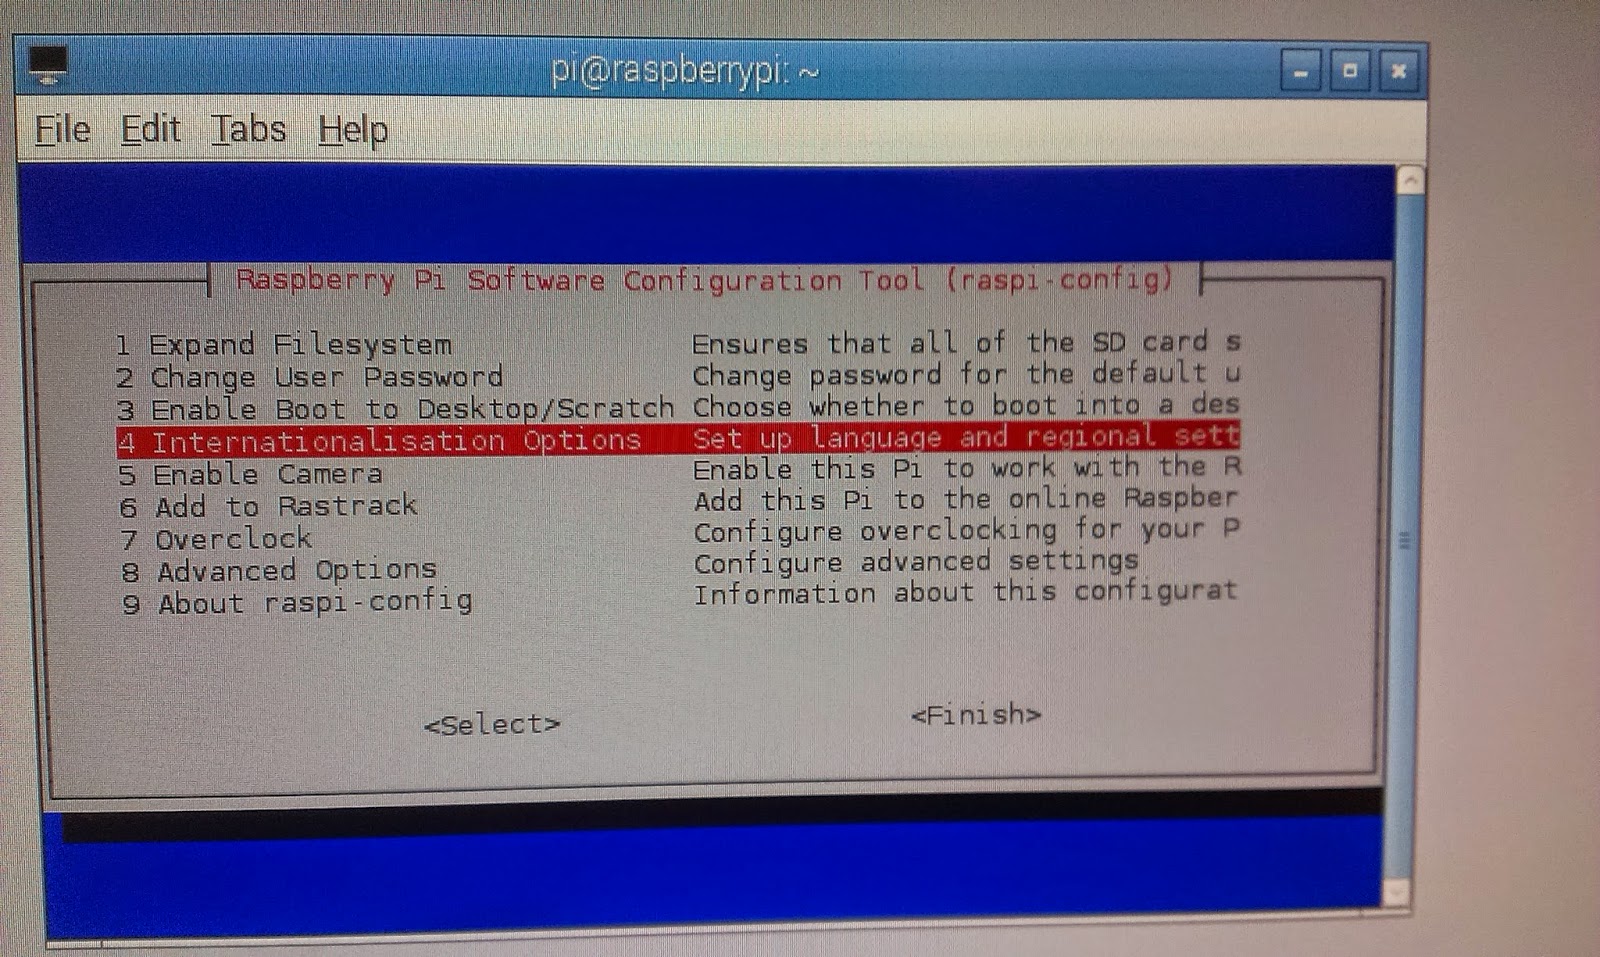
sudo raspi-config


2. In raspi-config, select:

4 Internationalisation Options


3. Select:

I3 Change Keyboard Layout


4. Select:

Generic 105-key (Intl) PC

5. Change the keyboard layout to US:

English (US)


6.  Select:

No AltGr key


7. Select:

No compose key

8. It is up to you to select Yes or No.

Quit raspi-config.
The Raspberry Pi may need to restart for new keyboard settings to be applied.

Wednesday, April 15, 2015

WordPress installation

To setup a blog server on Raspberry Pi, WordPress is a good solution.

1. Install Apache, MySQL and PHP.

2. Install WordPress:

sudo apt-get install wordpress


3. Link the newly create folder "blog" on Apache server to the location of WordPress:

sudo ln -s /usr/share/wordpress /var/www/blog

go to /var/www/blog/ and check with the ls command.


Go back to /var/www/ and type ls -l.

It is shown that blog -> /usr/share/wordpress.


4. Go to MySQL monitor:

mysql -u root -p

Create a database called "wordpress" within MySQL monitor:

create database wordpress;

Check if the database is created successfully:

show databases;
Type quit to exit the MySQL monitor.

5. Copy and edit the php file below using these commands:

sudo cp /var/www/blog/wp-config-sample.php /etc/wordpress/config-default.php

sudo nano /etc/wordpress/config-default.php

6. Edit the database, username, and password as:

wordpress, root, and your_password


Use a browser of another PC to access:

192.168.xxx.xxx/blog/

the browser is redirected to

192.168.xxx.xxx/blog/wp-admin/install.php


Follow the instructions to install WordPress.

Done~

Login to WordPress and add the first post.


Go back to the blog address:

192.168.xxx.xxx/blog/

Now the first post is successfully displayed!!


Tuesday, April 14, 2015

MySQL server installation

1. Install the MySQL server:

sudo apt-get install mysql-server

2. Choose the password for "root" user:


3. Also, install this:

sudo apt-get install php5-mysql


4. Type this:

mysql -u root -p


5. List the databases:

show databases;

6. Exit the MySQL monitor

quit

7. To check the version of MySQL, type this command:

mysql -V

or

mysql --version


Monday, April 13, 2015

PHP installation

PHP = Hypertext Preprocessor

1. Connect Raspberry Pi to the internet

2. Update and upgrade with these commands:
sudo apt-get update
sudo apt-get upgrade

3. Type in this command:

sudo apt-get install php5


4. Edit the test.php file under /var/www/ using nano:

cd /var/www
sudo nano test.php

Add the codes below:

<h1>Hello World</h1>
<?php phpinfo(); ?>


5. Use a browser to access the address:
http://192.168.xx.xx/test.php


Now PHP is working!

The PHP version is shown in this page.

To check the version in command line, use:
php -v

If the PHP Info table below Hello World! string is not shown,
try repeat steps 2 and 3.

For more information about how to create a PHP file for web-browsing, see this:

Sunday, April 12, 2015

Samba server installation

Update: December 11, 2015
Add Mac window diagrams at the end of this post.

1. Connect Raspberry Pi to the internet

2. Update and upgrade with these commands:
sudo apt-get update
sudo apt-get upgrade

3. Install Samba with these commands:
sudo apt-get install samba
sudo apt-get install samba-common-bin

4. Edit the config file:
sudo nano /etc/samba/smb.conf

Ctrl+W to search for 'security' and remove the '#' sign before:
security = user

Add the following lines to the bottom of smb.conf:

[RPi]
comment = My Raspberry Pi
path = /home/pi/share/
public = no
writable = yes
browseable = yes
create mask = 0777
directory mask = 0777

Save the changes.


5. Type this command:

sudo smbpasswd -a pi

Type the password 'raspberry' twice.


6. Check the status:

sudo service samba status

To restart the server, type:

sudo service samba restart

7. Create the share folder

mkdir share

8(a). Use a Windows PC to connect in networks to the Raspberry's IP address (ifconfig), not in browser (otherwise it will connect to Apache server).


Enter the password.
(Sorry the interface is in Chinese)


Copy a file to Raspberry Pi.

Check that the file has been successfully copied to the share folder.

8(b). Use a MAC to connect to Raspberry Pi.

In Safari URL, type in:

smb://192.168.xxx.xxx (Raspberry Pi's IP address)

This brings up the password dialog below.

Select RPi

The photo copied from Windows PC to Raspberry Pi is shown.

Congratulations! The Samba server is working!

Update: December 11, 2015
Add Mac window diagrams in Chinese.

Select 'Finder'
Choose 'Go' -> 'Connect to server'.

Enter the server IP address.

Enter the user name and password.

Drag a file to RPi in Finder.

Open the file manager of Raspberry Pi.
Now the file can be seen if the share folder.

Friday, April 10, 2015

Wi-Fi connection setup for Raspberry Pi

This post is based on Raspberry Pi 2 Model B.
The Wi-Fi setup procedure for Raspberry Pi 3 could be different.
Since Wi-Fi is already build in for RPi 3, 
it is no longer required to purchase a Wi-Fi dongle.

To connect to the internet wirelessly, a USB Wi-Fi dongle is required.
The one I got is EDUP EP-N8508GS.

You may refer to the USB Wi-Fi adapter list for Raspberry Pi.

Type lsusb, the 802.11n WLAN adapter is detected.


Go to Menu -> Preferences -> WiFi Configuration

Select Manage Networks -> Scan within the wpa_gui.

Select the AP (Wi-Fi hotspot) to be connected to.
Double click it.

This window should appear. 
Enter the password.

Select Current Status -> Connect.
If there is no connection as below, check the password.

After re-entering the password correctly, the connection is successful.

Type ifconfig.
The IP address of wlan0 is the same as the value in wpa_gui.

The IP address can also be obtained with this command:
hostname -I

It is working now!
You can open the Epiphany browser to surf the web!

The Raspberry Pi should automatically connect to network after a reboot.


==============

Chinese version of this post:

Friday, April 3, 2015

Apache HTTP server installation

To install Apache, type this command in the terminal:

sudo apt-get install apache2


Type Y to continue.

Check if the Apache server is running:

service apache2 status


Get the IP address of the Raspberry Pi by typing:

ifconfig
 Use a PC browser to access the IP address just got, and the browser should become:


Congratulations when you see 'It works!'

=======

To stop / start / restart the Apache server, enter:

sudo service apache2 <command>

or

sudo /etc/init.d/apache2 <command>

where <command> is stop / start / restart.


To check the Apache version, type this:

apachectl -V

or

Install MySQL server first and then login to phpMyAdmin.

=======

To check if port 80 used by HTTP is correctly configured, type this:

netstat -an | grep :80


To check the port from another computer, type this:

curl -s 192.168.xx.xx:80